The Science Behind Bubbles
- December 16, 2013
- By Robin Koontz
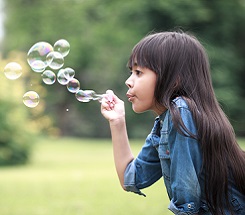
Bubbles! We all know how fascinating they are, evoking happy memories of blowing and chasing the mystical orbs with our friends. A bubble’s fragile nature, beautiful rainbow colors, and ability to soar through the sky make them universally fascinating among kids.
What’s the science behind (or inside) a bubble? Bubbles provide the opportunity to study science concepts such as elasticity, surface tension, chemistry, light, and even geometry. Your students can engage in processes such as observation, experimentation, investigation, and discovery, simply by studying bubbles.
For starters, here is a fun demonstration that you can perform as you explain some of the science of bubbles for kids. Follow the recipe at the end of this article to make some super strong bubbles for your act. Wearing a clown suit is optional.
Blow a bubble, get a few laughs. Then talk about what makes a bubble.
A bubble is just air wrapped in soap film. Soap film is made from soap and water (or other liquid). The outside and inside surfaces of a bubble consist of soap molecules. A thin layer of water lies between the two layers of soap molecules, sort of like a water sandwich with soap molecules for bread. They work together to hold air inside.
Create a bubble that stretches out using a large wand (that you can make from a piece of wire). Whoosh it through the air so that the bubble follows and grows behind it. Then, with great drama, let the bubble go. Give the students a chance to note what happens to it before it pops.
Why is a bubble round? Bubbles can stretch and become all kinds of crazy looking shapes. But if you seal a bubble by flipping it off your wand, the tension in the bubble skin shrinks to the smallest possible shape for the volume of air it contains. That’s why even if it had a goofy shape before you sealed it, once sealed shut, the bubble will shrink into a sphere shape. Compared to any other shape, a sphere has the smallest surface area for the amount of volume.
Blow several bubbles and have the students blow and fan them to keep them from landing. The object here is to watch them pop without obvious interference. And it’s a bit of fun for everyone.
Why do bubbles pop? Other than being poked or landing on something sharp, bubbles pop when the water between the soap film surfaces evaporates. To note, when it’s cold, those molecules take longer to leave. If you blow a bubble on a calm winter day, a bubble can even freeze and last for several minutes before it wisps away.
Also, the colder the outside temperature is, the higher a bubble might fly. That’s because the warm air from your breath is lighter than cold air.
Blow more bubbles and ask a few students to study them close-up. What do they see? Is a bubble really transparent, or do bubbles have colors? Can they see their faces in the bubbles?
A bubble gets its color from light waves reflecting between the soap film’s outer and inner surfaces. The distance between the layers gets smaller as the water evaporates, making the colors change. Bubbles can also reflect what’s around them, like the faces peering at them.
Blow several bubbles with a straw so that you have a three of them stuck together – this might take practice!
Why do bubbles stick together? Since a bubble tends to minimize its surface area, bubbles will join together to share one common wall. Three bubbles will meet at the center, always at an angle of 120 degrees.
This is not as easy to set up, but not that difficult and a very cool experiment: use two sheets of clear plastic that are about a half inch apart. You could put one sheet on a table and prop up the second with thin blocks. Soak the sheets in a bubble solution, place them, and then blow bubbles between them.
When bubbles are about the same size, they form perfect hexagons. Bees do the same thing when they build a beehive. Bees, like bubbles, are also very efficient with their spaces. They use the minimum amount of wax to create their spaces.
Your Grand Finale: Set the lid of the bubble container on a table and fill it with bubble solution. Dip a straw into the container so it is moistened by the solution, and blow a bubble on the lid. Then draw out the straw. Magic! Next, dip the pointed ends of a pair of scissors in the solution. Poke them through the wall of your bubble. Let the kids try poking other stuff that has been moistened in the solution, even their fingers. You can then poke your straw back inside the bubble and blow another bubble. By now, you should be super awesome in their minds.
Why didn’t the bubble pop? The bubble just wraps itself around anything that is wet, filling in the hole that would have been made.
There is a lot more to know about bubbles. Hopefully your amazing demonstration will get your students interested in learning more about the science of bubbles!
The formula for awesome bubbles:
1 cup liquid dish soap like Joy or Dawn (not “ultra”)
6 cups distilled water inside a clean container that has a lid
1 tablespoon glycerin OR 1/4 cup light corn syrup
Pour the dish soap into the water and mix it without letting bubbles form (that’s for later!). Put the glycerin or corn syrup into the mix and stir. You can use it right away, but some bubble-lovers recommend covering and letting the bubble mix sit overnight.


