Heat, Cold, and Energy—The Science of Ice
- February 3, 2014
- By Christy Peterson
 I really should have written this post in August. But as much as we hate scraping it off our windows on a frigid morning or walking gingerly across a slippery parking lot, the science of ice is fascinating stuff.
For example, did you know that ice has 15 different crystal forms? Or that there really is no such thing as making something colder? I’m getting ahead of myself though; let’s start at the beginning.
What is Temperature?
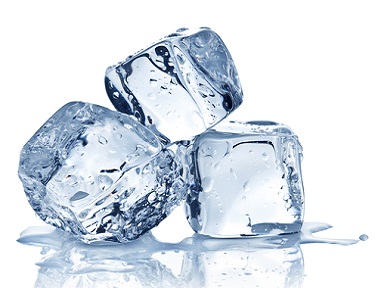
Temperature is a measure of the speed (or energy) of the atoms in a given substance. More formally, “temperature is a measure of the average amount of kinetic energy possessed by the particles of an object.” Atoms are always in motion. The faster they move the more energy they contain. If a substance with fast-moving atoms (like a hand in the experiment below) meets a substance with slower atoms (the ice cube below), the energy from the fast-moving atoms wants to move into the substance with slower moving atoms. When the two substances are at the same temperature, scientists call this “thermal equilibrium.”
What is Heat?
Heat is energy, pure and simple, but it really is energy on the move. “Heat is the transfer of energy from a higher temperature object to a lower temperature object.” Here is a simple demonstration of this principle you can use in the classroom.
You’ll need:
- A bag of ice cubes (enough for one ice cube per student)
- Paper towels
- A plastic tub (for collecting ice cubes at the end)
Activity
Give each student an ice cube and a couple paper towels. Have them hold the ice in their hand and observe what happens. Record their observations on the board. When you’ve exhausted the (useful) observations, collect the ice cubes in the plastic tub.
Discussion Questions:
- What happened to the ice?
- What did your hand feel as the ice was melting?
- Why did the ice melt?
Most students (and many adults too) think that the hand feels cold because the “cold” from the ice is penetrating the skin. Actually, the hand feels cold because the heat from your hand is leaving your skin and moving into the ice. This is why the ice melts.
What is Ice?
This is one of those “duh” questions. Ice is frozen water. Water molecules are made of one oxygen atom bonded with two hydrogen atoms. They form what a layperson would call a shallow “V” shape, with the two hydrogen atoms on the outside and the oxygen atom in the middle. From about 32°F to about 212°F, water is in a liquid form. In liquid water, the hydrogen atoms are constantly making and breaking bonds with the other hydrogen atoms. These bonds are strong enough to keep the water from changing to steam, but loose enough that the molecules move around freely.
If you apply heat, the molecules absorb the energy from the heat source and become increasingly energetic. At around 212°F, the bonds between the hydrogen atoms of the water molecules break and the molecules escape into the air as water vapor.
On the other end of the scale, slow the molecules down to about 32°F and the hydrogen atoms lock together in a pattern that forms a crystal. These crystals take up more space than the free-flowing molecules of liquid water, which is why ice is less dense than water and can float.
You can have a little fun with the crystallization process of water. As we mentioned, unhindered, water forms a solid at around 32°F. However, if another substance is mixed with the water, creating a solution, the atoms of that substance can interfere with the ability of the hydrogen atoms to form solid bonds. This will change the temperature at which the water freezes.
You’ll need:
- 4 small containers, equally sized (or a set of four for each group of students)
- Masking tape, optional (for labelling containers)
- A way to measure the water (I used a 1/3 cup measuring cup)
- Table salt
- Spoon or stirring stick
- A thermometer (I used an instant-read from my kitchen.)
- Sugar (optional)
- Measuring spoons
- A cookie sheet or tray (some way to move the containers in and out of the freezer easily)
- Water!
Activity
- Label the containers A,B,C,D.
- Put an equal amount of water into each container (around 1/3 cup).
- Put ½ tsp. of salt into container B. Put 1 tsp. salt into container C. Put 2 tsp. salt into container D. (Do not put any salt in container A.)
- Mix the water until the salt dissolves.
- Record the water temperature in each container.
- Place the containers on the tray and put the tray into the freezer.
- Check the temperature of each container at regular intervals. I checked every half-hour at the beginning, but this may not be practical in a school setting.
- Record the time, “state” of the water (liquid, starting to crystalize, mostly crystalized but still can put thermometer in, solid, etc.), and the temperature of the water at each interval.
Discussion Questions
- Will there be a difference in the rate of freezing among the containers? Why or why not?
- What do you notice about the temperature differences among the containers during the experiment?
- Do the crystals look different in the different containers?
- What happens to the salt as the water cools and begins to freeze?
As with many natural processes, ice forming is actually more complicated than this simple experiment encompasses (see The Freezing Process below). That said, this experiment does do a nice job of demonstrating how other substances can interfere with water’s ability to form a solid. I recommend trying the activity a second time (or simultaneously) with the sugar. The sugar water forms much different crystals.
- Quotes in the article above are from Heat and Temperature, The Physics Classroom http://www.physicsclassroom.com/class/thermalP/u18l1d.cf
- The Freezing Process, a nice, technical explanation from the University of Calgary http://people.ucalgary.ca/~kmuldrew/cryo_course/cryo_chap6_2.html
- More Fun with Ice, Ice Balloons, San Francisco’s Exploratorium http://www.exploratorium.edu/afterschool/activities/docs/iceballoons.pdf


