Making Tracks
- September 2, 2013
- By Rebecca Guenard

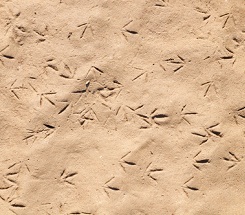
With summer vacation already behind us, it can be tough for students to sit still in their seats. The solution: get them outdoors! Take your students for a stroll around the school grounds and see if there are any signs that an animal passed through the night before, after everyone went home for the day. You and your class might be able to spot evidence that animals have passed through your playground in search of a tasty snack.
Know What to Look For
There are several sources for determining what animals are native to your area and getting images of their tracks. Your local parks and recreation department, nature center, or watershed should be able to provide you with a list of creatures whose tracks you can expect to find. You can also simply enter “animal tracks” into a search engine. There are many state-specific web sites that will help guide you toward what to look for in your area.
Print out images of the animal tracks to share with your students. You can print out animal hand/foot prints onto card stock and laminate them so they are rugged enough for the outdoors. Break your students into teams and have them search for one type of track – Raccoon Team or Deer Trackers, for example. Or you can let each group explore the outdoors for all tracks at once. Just make sure to remind everyone to watch their step so they don’t tread on any tracks.
Cast Your Find
Like a true field biologists you will want a permanent record of what you discovered. When you head outside, bring along the following: plaster of paris, water, 16 oz paper cups, a measuring cup and a mixing tool.
You’ve found a track — awesome! Here’s what you need to do to be able to take it back to the classroom with you. First, create a dam around the track by piling up dirt – this will contain the plaster while it dries in the track. Keep this perimeter as close to the animal track as possible, but be careful not to push any dirt into the track or you risk damaging it. Try to keep the circumference of the dam to softball size or smaller to assure the mold dries quickly. (It also helps to make the mold on a dry, sunny day when conditions are optimal for quick curing of the plaster.) Clear away any debris that is within the area you have closed off. Next prepare the plaster for the cast by mixing 2 cups plaster of paris with one cup of water. Stir the plaster until it is a smooth liquid. Slowly pour the plaster into the animal track first, then keep pouring until you have used all the plaster and the dam is filled. Now wait 15-20 minutes until the plaster dries.
While you wait have a discussion with your students about all the animals that are native to your area and the types of habitats each animal requires. Talk about what kinds of food the different animals eat. Discuss why the children will see more animals in the spring. Your class will have a better understanding of the ecosystem right outside their classroom and in no time the plaster mold will be dry. When you are confident the plaster is dry pull the dirt dam away from it and lift out the cast you have created.
An Urban Alternative
If you live in the city (or if your track hunt was unsuccessful), you can make a cast of a homemade animal track. In addition to the above supplies you will need some paper plates and clay.
Before you begin this project with your students, decide what prints you would like to cast. There are a few options. You could choose to either buy or create your own animal track imprints. (This link explains how to make track stamps .) Or think about what you have in your classroom. If you have statues of animals they can be used for imprints. Or ask your students to bring items from home. Some teaching supply stores sell small “dinosaur bones” which work really well if you want to take the lesson in a different direction. Have fun and be creative.
For do-it-yourself tracks, give each student an adult-sized fist full of clay and have them form it into a thick disc about the size of a jelly-filled donut. Lay the disc down on the paper plate and pinch up the sides to create a dam, just like the outdoor example, so the plaster is contained in the clay area. Gently press the item you wish to imprint into the clay and then slowly pull it away. If any sides of the clay dam were compromised while creating the track, be sure to build them back up before pouring the plaster. Now that you have a kid-made track, you can make a plaster mold of it by following the instructions above. Your students are going to love taking home a memento of this fun lesson.