 The fourth of July marks the official start of summer for many families in the U.S. The kids have been out of school for a while, and are getting into the groove of unscheduled days. Most summer sports, like t-ball, are over by this time. Temperatures are well into the sunny highs. For my family, the fireworks and picnics on the 4th signal the onset of the seemingly endless summer. Unfortunately, it could also be the start of endlessly declarations of “There’s nothing to do.”
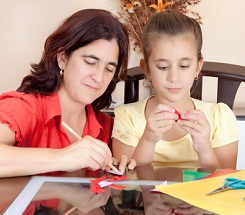
Every year, I try to combat boredom (and summer slide!) in my kids, with a stream of books, writing exercises, and math minutes. Regular trips to the library are a necessity, as are visits to museums, the zoo and parks. But for the days when these outings aren’t possible, I like to get them involved in fun creative projects. It’s a great way to keep them occupied and learn something new at the same time.
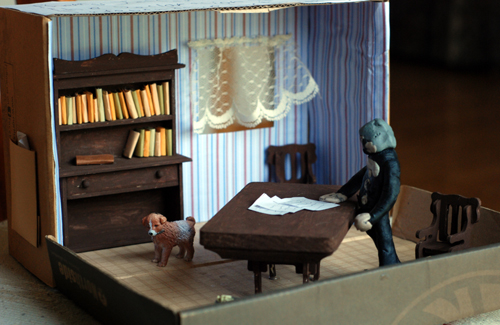
For a different kind of project this summer, here’s a simple diorama you can make with your family. It’s a miniature scene of Thomas Jefferson working at his desk. Although the Declaration of Independence was written in Philadelphia, this diorama shows Jefferson at his home — called “Monticello” — in Charlottesville, Virginia. As you work on this project, talk to your kids about each element and how it is connected to Jefferson’s life and work. It’s fun for them to learn a bit of history and also be creative in how they can make the scene as authentic as possible.
Materials:
shoebox with lid
modeling clay (black, grey and white colors)
toothpicks
printed or patterned paper in subtle colors
cardstock in neutral colors
small sticks or other bits of wood (use cutouts from the doll furniture)
wooden doll furniture
brown paint
3 inch square of lace or sheer cloth
thimble
sheet of white paper
toy dog
glue gun
glue stick
craft knife
Below are the directions for making your own diorama.
The Room
The third President made his home in Monticello, a 5,000-acre plantation, where he tested many of his ideas and inventions. Jefferson loved to read. He wrote a lot of letters and kept meticulous records of the weather, daily life, and the work in his farm. He was a man of some wealth, so his rooms were well-furnished and comfortable. We’ll show this by decorating our diorama with wallpaper and by using lace as a window covering.
Open up the shoebox and tip it on its side. Use a craft knife to cut out an opening for a window. Measure and cut a sheet of patterned paper for the three walls. Use a glue stick to adhere the paper to the inside of the box. Cut out the opening for the window. Next, measure and cut a different sheet of patterned paper for the floor, and glue to the bottom of the diorama. Glue the lace or sheer cloth across the window.
Furniture
Most of the furnishings in Jefferson’s home were handmade of wooden materials. For the diorama, assemble the wooden doll furniture. We used two chairs, a bookshelf and a table from a dollhouse set we got at a craft store. The doll-sized table originally turned out to be too small for what we needed so we added a wooden plaque on top of it to get the right size.
Paint all the furniture pieces brown. This is a fun task for the little kids, because the paint doesn’t have to be perfectly applied. In fact, uneven application adds to the rustic effect, so let them have a go at it!
Thomas Jefferson
While the paint is drying on the furniture, make the figurine of Thomas Jefferson. You can be as fancy as you want. For our project, we used a simple clay figure.
Shape and roll two equal pieces of black clay into elongated cylinders for legs. If you’re using clay that won’t be baked, insert a toothpick into each leg to stabilize the figure. Next, make the body and arms of black clay, the face and hands of white clay, and the hair of gray. My son added a tie and buttons because he thought a U.S. President should wear a suit or a tuxedo all the time. Use toothpicks to attach the parts to the body. (If the clay needs to be baked, follow the manufacturer’s instructions.)
Books
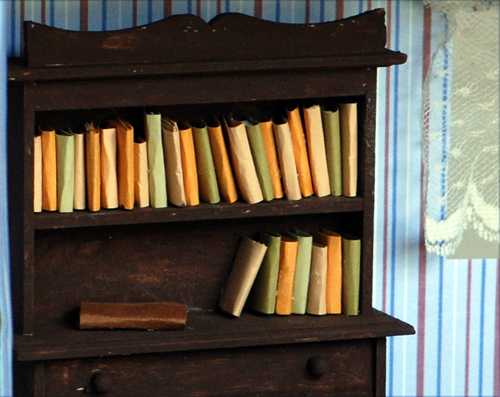
Jefferson collected thousands of books for his home library. So our miniature scene also contains a bookshelf with tiny books.
To make books for the shelf, cut small squares of various colored cardstock. The squares don’t have to be perfectly even or of the same size. To make one book, wrap a paper square around a piece of wood and use a glue gun to secure the wood to the paper. When you’ve made a set of miniature books, glue them to the bookshelf.
The Diorama
To assemble the diorama, arrange the furniture, with the bookshelf against the wall and the table near the center. Position the Thomas Jefferson figure beside the table, with one hand on the top. Add a few small sheets of paper on the table. Crumple additional bits of paper and stuff them into a thimble, which will serve as a waste basket.
We also added a toy dog to the display. Jefferson kept Briards, a type of herding dog, both as working animals and as household pets.
Whether you choose to make a diorama exactly this one, or use these ideas to create other scenes, use the opportunity to explore history with your kids. A diorama makes a wonderful complement to a visit to a museum or historical site this summer.

